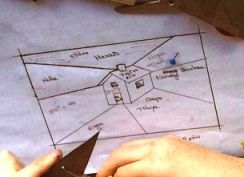
 The drawing is prepared like element by element technique, with possibility of legend, color,...
STANLEY KNIFE
METHOD
Each piece is cut out in turn and put together to the former one.
This is an unrewarding method because it's difficult to cut pieces since they're against the grain and consequently brittle.
It may nevertheless be used if patterns are not too complex, in restoration or to make some pieces again.
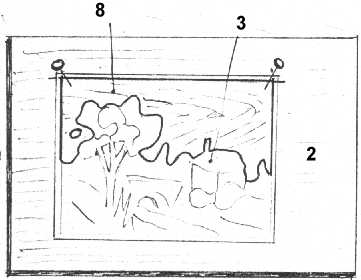
1 - DRAWING MAKING
The drawing is prepared like element by element technique, with possibility of legend, color,...
2 - PUTTING IN PLACE
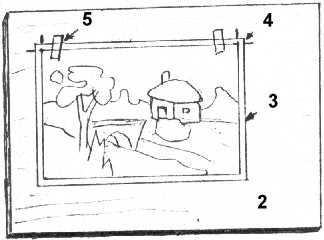 The drawing 1 is put on the playwood support 2.
The tracing paper 3 is made with the help of the drawing and fixed on the support after pointing out marks 4 with the aid of sellotape 5.
The drawing 1 is put on the playwood support 2.
The tracing paper 3 is made with the help of the drawing and fixed on the support after pointing out marks 4 with the aid of sellotape 5.
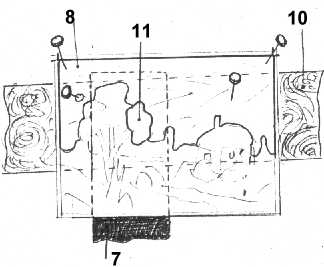
3 - DRAWING OF THE FIRST PIECE
 The venneer of the first piece 6 (the biggest one, example here the sky) is put under the tracing paper, and a sheet of carbon paper 7 is inserted between the tracing paper and wood.
The lot is fixed with the help of pins, put if possible outside the future piece,
especially if woods are light.
The venneer of the first piece 6 (the biggest one, example here the sky) is put under the tracing paper, and a sheet of carbon paper 7 is inserted between the tracing paper and wood.
The lot is fixed with the help of pins, put if possible outside the future piece,
especially if woods are light.
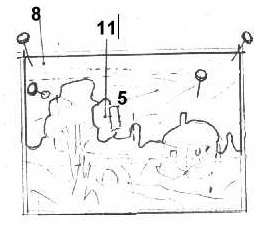
4 - STANLEY KNIFE CUTTING TECHNIQUE
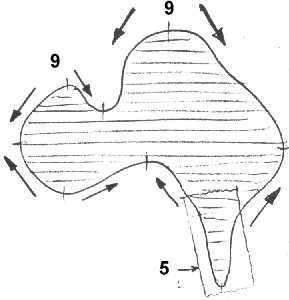 When you cut out, you have to take care to consider the wood fibres, as indicated by the arrows 9 and to protect the fragile pieces with the help of sellotape 5.
5 - PUTTING OF THE FIRST PIECE
 The first piece 8 is held by pins on the support.
6 - DRAWING OF THE SECOND PIECE
 The plywood 10 is positionned to make the drawing of the second piece 11, on the basis of the cutting of the first one 8, and from the tracing paper for the remaining piece with the help of carbon paper 7.
7 - SECOND PIECE'S PUTTING IN PLACE
 The piece is fixed to the first one with the help of sellotape.
That's the way you go about for every cutting.
You come at the end of the 7th stage of the element by element method.
The piece is fixed to the first one with the help of sellotape.
That's the way you go about for every cutting.
You come at the end of the 7th stage of the element by element method.
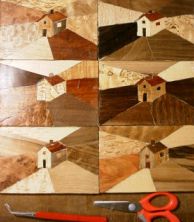
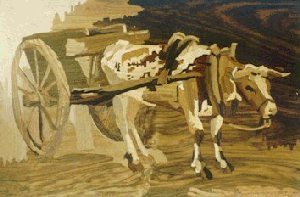 <----- Work that was cut out according to this technique.
